Monday, 28 January 2013

Much better Moon(s)!

Whilst testing out the guiding capabilities of my setup (inconclusive at this time),  I decided to test out both telescopes on our beautiful Moon. Last night (27th January 2013), she was full and really bright, so a filter was used to bring down the brightness. Without it, all the camera was picking up was a big white circle!

Anyway, the first shot:
Moon 27th Jan 2013 with QHY5v and TS Optics 150mm. Mosaic of 5 images of 263 frames each.
 This was taken with the larger of the two scopes. It has actually been built up from 5 images of different regions, which in turn have been taken from an .avi file of 263 frames per image. These 5 .avi files have been aligned, stacked and processed in Registax 6, an excellent piece of free software, and then exported to Photoshop where they are stitched together to make the final image.

And the second image:

Moon 27th Jan 2013 with QHY5v and William Optics 66mm. Mosaic of 2 images of 1863 frames each
This image is taken with the smaller WO66, but is a mosaic of 2 images made from 1863 frames each. The greater number of frames has clearly led to a sharper image, but unfortunately there is a blemish in the Procellarum Oceanus (top left). I have amateurishly tried to remove the blemish in the next image, but a reprocess will be in order to get rid of it more effectively:
Moon 27th Jan 2013 with QHY5v and William Optics 66mm. Mosaic of 2 images of 1863 frames each (Blemish Removed)

All in all I'm pretty pleased with what my kit has produced. It's not a lunar set up by any means but these pics are quite pretty! I just worry now that getting a taste of solar system imaging could lead to another purchase. A nice Catadioptric could be on the cards!

Friday, 18 January 2013

Building a website....

Started putting a website together over the last few days...

www.badgerastro.co.uk

...the idea being that it can be a 'one-stop-shop' for astronomy. So I'm putting up basic articles about telescopes, how to use them and what to / not to look for, introductory astronomy articles and links to good suppliers and further information. It's not completed yet, but if anyone fancies it, I'd appreciate some feedback. If you have a minute, please let me know what you think - all criticism welcome! E-mail for the website is admin@badgerastro.co.uk, or you can leave comments here!

Thanks in advance,

Badgerchap

Sunday, 13 January 2013

New pics! One new target and one old....

First useable astropics in some time! I took these last night and then processed them today:

M42 The Great Oriuon Nebula: Back to an old favourite.
 I took this at the end of my session yesterday, with 60 exposures of 30 seconds each on ISO 800. The scope was the TS 6" and the exposure was unguided, which frankly shows. Collimation is clearly still off (grr) as there is flaring on the brighter stars, but things are working, but guiding can't come soon enough! I certainly prefer the Running Man part of this compared to earlier attempts, but the colours in the main gas cloud seem over blue. I think if I can improve the stars with guiding and get a bit better with processing, I might start to get a decent image here.

NGC2024 (The Flame Nebula), IC 434 and Barnard 33 (The Horsehead Nebula)

This is the first time I've had a go at what is one of my favourite deep sky objects. The Flame is the large yellowish flash next to the largest star, Alnitak, which is the leftmost star of Orion's belt. IC434 is the pinkish streak and the Horsehead is, faily obviously, the small horsehead shaped diffuse nebula within IC434. When I was younger, I thought the horsehead was the whole complex, which still looks to me like it might be the head of a dragon.
The Horsehead itself is a vast cloud of dust which obscures the light emmanating from the emission nebula behind.

As for the image, I'm fairly pleased considering the equipment. My DSLR is unmoddified, which means that its built in Infrared filter is obscuring much of the light from IC434, a Hydrodgen Alpha region. Also, as with the image of M42, the collimation is inaccurate, leading to star flaring. Otherwise, it's not to bad. Guiding and better collimation will tidy things up a lot, even without a modification of my DSLR!

Saturday, 12 January 2013

Whilst my new kit is outside having a stab at the Horsehead Nebula, I thought it must be a good opportunity to plug a little documentary I made early last year. The sound's not terrific, but considering my microphone was a pair of iPhone headphones, what can I expect?! Comments kindly
requested. Thanks!
 
Incidentally, I do have the video sequence ready for a second episode, with somewhat better graphics, but haven't yet done the voiceover. If I get a positive response here, maybe I'll finally get around to finishing episode 2!

Friday, 11 January 2013

New Scope!

Once again, the clouds have remained resolutely in place, so what to do but mollify my needs by buying a nice new telescope!
 It is a TS Optics 6" (150mm) f/4 Newtonian, nice and fast for imaging. However, it came in the post, which means it's been plenty jossled in its travels!

I originally worried that there was something awry with the focusser, as it was very stiff and made a grinding noise. Turns out I hadn't taken into account that the focusser is presumably designed for imaging, and thusly to hold on to big heavy cameras. This means there are a number of tightening bolts on the mechanism which I'd neglected to loosen! Phew! No Problem.
Next problem isn't going to be so easy, and is going to take a lot of tweaking and, probably, swearing. There is a collimation issue, of course from the postal service! However, I'm less than expert at collimation, having only ever used a big Dobsonian. Whilst these need collimation, it doesn't need to be nearly as precise as with an imaging setup.


So, it's time to show you first light. Might seem to a reader as a step backward, as the focussing is terrible, but the image is only a single 1 minute sub, so there's clearly plenty of light arriving at the sensor.


Well, it's a starting point, another one, but there's still a mountain to climb. Once I have the collimation sorted on this puppy, then it's time to set out on the trying adventure that is autouiding! Wahey!

Wednesday, 28 November 2012

Cassini @ Home


Just something I've thrown together out of the continued boredom of this interminable cloud and ever brightening moon. After seeing the following image, which frankly blew my mind (if only I could et such resolution from here!), I looked for Cassini raw data, and found a haul of treats, some of which I threw together to make this video of Enceladus' jets.
Image Credit: NASA / JPL / Space Science Institute
 This photo of Saturn's North Polar Vortex was taken on November 27th 2012 by Cassini.

Thursday, 18 October 2012

After a long summer....

Well the long days and bright nights seemed to last forever this year, but I have finally been able to get my 'scope back online and have taken a couple of wee piccies! Finally!

I've also been able to do a little processing, after a good tutorial (http://flintstonestargazing.com/2009/06/26/my-quick-deepskystacker-tutorial/). The author explains everything nice and plainly, so I actually got some half decent results whereas before I was getting nothing!

So....

Here's M31, the Andromeda Galaxy. Just 5 subs at 2 mins each, ISO 800. Processed in Deep Sky Stacker.
M42, the Orion Nebula. 27 subs, 2 mins. ISO 1800. Processed in DSS.

I was originally unhappy with both of these, until I read a great tutorial (http://flintstonestargazing.com/2009/06/26/my-quick-deepskystacker-tutorial/) and had another attempt at the processing. I was eventually really pleased with the results! Not quite Hubble, I know, but certainly an improvement on my early attempts!

I'm pleased to have been able to get the accompanying Running Man nebula in the image of M42.It hadn't been discernible in the raw images, so I was delighted when it popped out whilst tinkering with the luminance!

And I'm surprised to have got as much detail for M31, for so few frames, but it's encoraging to see that it can be done with my kit!

Tuesday, 3 July 2012

Well, things are still on hold after the 'fried-motor-drive' incident, but in a miniscule gap in the clouds, I have been able to snap an OK shot of the sun. Thought I might as well post! It's just a single frame shot as ISO 100 at 1/1000th of a second. Sharpened twice with an unsharp mask and a quick colour tweak!

Wednesday, 6 June 2012


So this week has been pretty unsuccessful, to say the least.

It began with an attempt to photograph the sun in preparation, or rather as a practice run, for the Transit of Venus.

Well, let me regress first by saying how I'd previously used the variable PSU for my 6v motor drives on my 12v sound system. I forgot to reset the PSU to 6v and used it once again on my motor drives. Looking through the eyepiece, I noticed no movement, or rather, that the sun apppeared to be moving through the field of view. Most odd. I looked at the controller for the motor drives, which had smoke emanating from the 'on/off' switch!


This picture shows the melted transistors that I'm now going to have to replace. It's been about 13 years since I last wielded a soldering iron, and I don't have a multimeter, so I don't even have much of a way of telling which transistors need replacing! Ho hum.

Well, not to be put off, I did some practice shots of the moon, and decided that I'd have to stay with single, untracked shots for the transit. So, all equipment ready, camera settings decided upon and just the sun and an obliging planet to wait for, I was ready for Wednesday.

Of course, being Wales, 5 o'clock dawned, and it was wall to wall cloud. Back to bed and to wait another 105 years then....

Tuesday, 29 May 2012

Getting closer!

So I finally think I have something that I can call an Astroimage.

It's not the best, granted, but I'm happy with it from a beginners point of view!

It's M13 again, of course - I wanted to at least get something right-ish before moving onto somethng new.

12 subs of 30 seconds at ISO 800, processed in Registax with one 30s dark.

Here's the (cropped) result!
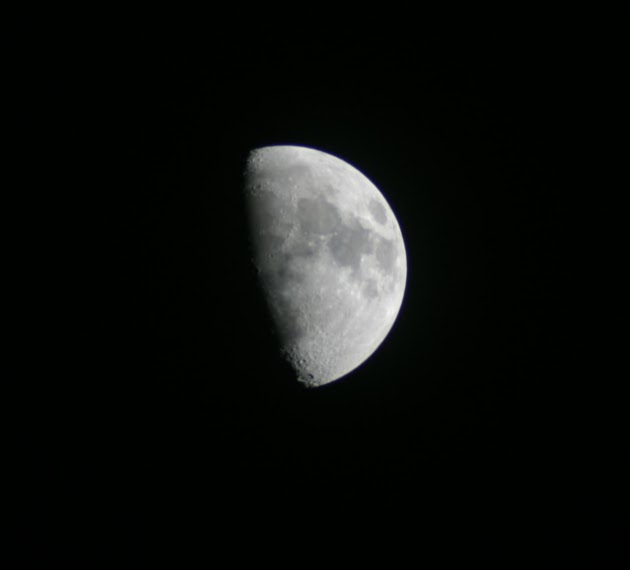
 It's a little dim and lacking in vibrance, but I'm fairly pleased. I'm sure I can improve it with time, but for a beginner, it could be worse. Mix in the fact that there was a blooming great moon this evening, and it don't look too bad! Talking of the moon, I also gave the moon a quick stab. This is around 10 frames, 1/20s exposure on I can't remember what ISO. Stacked in Registax.
 And cropped / enlarged in Photoshop CS5

I can just about discern the 'violet limb' that is expected from my scope, but I think I just about get away with it. Could do with better focus though....

Saturday, 26 May 2012

Well - I've had a modicum of success tonight! Whilst I'm still somewhat short of a viable Astropic, I'm certainly getting closer.

Tried out my Bhatinov mask first. It's now in the bin - a complete waste of time. Whilst I can see how it might be beneficial on a larger scope, with the tiny aperture of my Zenithstar, there was just nothing visible with the mask in place and the camera viewfinder leeching all the light away.

So instead I tried out the star trail focussing method - and I like it! I need a bit more refinement to get the focus just right (mainly because I forgot exactly where the sweet spot was!) but basically - I've proven the principle to myself - and here are some preliminary results!

I love this photo - despite it being little more than a curiosity, I think it's a beautiful demonstration of the rotation of the Earth. In case you don't know what's happening here, I have set my camera for a long exposure and intermittently covered and uncovered the objective lens of the scope. This causes the gaps in the star trails, which are in turn caused by the apparent motion of the stars (the main one is Vega) as the Earth spins on its axis. The apparent change in size is due to slight adjustments to the focus (1mm away or towards each time), with the thinnest line showing the finest focus.

 So here we are - the first legible apparition of M13 on my setup! I don't really count it as a proper Astropic yet as it is a single badly taken frame, but it's definitely improving. It's a 3 minute exposure with a hint of exposure added in Photoshop, but other than that it's raw. A bit more fine focus and a slight decrease in exposure (to take out the bulbous middle and reduce trailing), and I should be able to stack a few frames together and get something useable!


Same again but with a 5 min exposure.

All in all, much more encouraging tonight - I finally feel like I'm getting somewhere. But of course, as is the sky's wont - the moon is brigtening and I'll be all washed out for DSO's for the next couple of weeks, so it's back to the armchair astronomy for now!

Friday, 25 May 2012

Focussing, focussing...

So after an encouraging first night, things got a little frustrating with my second attempt.

I decided that M13 (a globular cluster containing several hundred thousand stars for those of you who don't know!) would be a good target. It's bright and easy to find, and it's well in the range of my equipment.

However, focussing became a real problem. It's my own fault really - I ignored people's warnings of 'you can't focus well through the camera's viewfinder', thinking I knew better.

Of course, all I got was blobs! The difficulty stems from the fact that even quite unfocussed images can look alright, when they're dimmed down by the glass in the viewfinder. So now I know...

Anyway, a quick entry into astrojargon.com  and a snip or two with some scissors, and I've a nice homemade Bhatinov mask. Will test it ASAIOOTMLPM (As Soon As I'm Out Of The Massively Light Polluted Midlands.)

Tuesday, 22 May 2012

<a href="http://www.hypersmash.com">HyperSmash</a>
Well, as expected, didn't get a fat lot to show people out of last night.

Mainly experimented with exposure times, practiced polar alignment etc.

What is clear is that stacking images is going to be essential, because at the moment, it's hard to see anything but stars in the pictures I have taken. In one picture though, with a little processing, you can just about see a little more....
Near the centre, and again halfway across the right of the image, there are two faint little smudges that are just discernible as galaxies! Wahey!

I believe they are a part of Markarian's chain, a beautiful sprawl of galaxies that trickles down between Leo and Virgo.

Other than that I learned that my maximum exposure times, for now will be about 3 minutes, 5 if I'm really well aligned.

I also had trouble with my guidance system, hence why my exposure times are so short. I couldn't actually pick up any stars with the guider, although in fairness, I did only try while the sky was fairly bright, so the sensor may have been being washed out.

On the positive side though, I did find out that even on long exposures, I wasn't getting "sensor glow" - a frustrating disease with older DSLR's where heat from the working sensor causes a big orange smear across the top of your images. That's always nice to know!

Monday, 21 May 2012

Right, so for my first night out, I'm not expecting a fat lot. In fact, I'm not sure if I'm even going to take any exposures. First come the joys of polar alignment, focus practice and seeing if there's any merit to my cobbled together guide scope!

I may inadvertently take a photo of one of my cats - they tend to climb up my leg when I'm out there in the dark, and I wouldn;t put it past one of them to ascend my tripod!

The sky is clear, night is on the way, so out I go!!
Hi, I'm Badgerchap. I've been doing visual Amateur Astronomy for some time now, but of late, I've been getting a little bored of faint fuzzies and rapidly moving planets that zip straight out of the field of view. Whilst there really is something truly awe inspiring about having photons arrive in your eyes that have taken millions of years to get there, I fancy a bit of colour - and some evidence to prove what I've been doing, outside and alone in the dark all these long nights!

So I've bought some very modest kit - actually, I should be honest, my girlfriend bought me the telescope, I bought the rest - and I'm ready to try my hand at a bit of Astrophotography!

So first, the kit....


The telescope is a small semi-apochromatic refracting telescope. To look at it's a lovely thing. Manufactured by William Optics, I am assured by other astronomers that it's a lovely little scope, so hopefully it should be nice to look through as well!

Next, there's the EQ5 mount. Now I've been advised that this reall is the smallest I can get away with. Lucky I have a small set up then! It's on a wooden tripod, which, whilst it looks a bit old-school, is actually lovely to use and should actually result in less vibration on breezy nights!

Then I have a Canon EOS 10D, which could prove to be a bit of a weak link. It's certainly not the finest DSLR available for Astrophotography, but I'll make do.

I also have a homemade guide scope / electronic finder scope. At the moment, any guiding I do will be manual through this, but I do intend to make it all 'Autoguiding' in the future.

And this is my location - the Dyfi Estuary in Gwynedd, Wales. I'm so very lucky - you could have a much worse view in the evenings!


So I'm inexperienced, lacking in knowledge, save for what I've gleaned from the excellent fellows at Stargazer's Lounge and Cloudy Nights.

This blog is going to document how I get on in this wonderful, inspiring and mind-boggling hobby!

So here I am, all set - now I'm off for exhaustive testing and a lot of failure! Rock on...